
Do you want to blend your love for the ocean and photography? If so, you should think about becoming an ocean photographer. You will get to swim in the ocean everyday, holding a camera and taking images. While at first glance, the job of ocean photography sounds easy, but there is more to it than meets the eye. So, how do you become and Ocean Photographer?
Back in 2016, I ask myself the question, “How do I become an Ocean Photographer?” Fast forward six years, I am now a full time Ocean Photographer making my living on photographing in the ocean. How did I do it? To become an Ocean Photographer, you will need to have access to the ocean, develop the skill of swimming while holding a camera in the ocean, build a portfolio of images that you can share with potential commercial clients, and set up an online shop to sell ocean prints.
Taking photographs in the water sounds impossible, right? I mean, a camera isn’t water proof! While the list of questions begin to trickle in, I wanted to put a quick pin here and note what you will learn in this article:
What you will learn in the article:
a) Story behind one of my favorite photographs to date
b) Logistics of photographing in the water
c) Some gear recommendations
d) Important safety checks
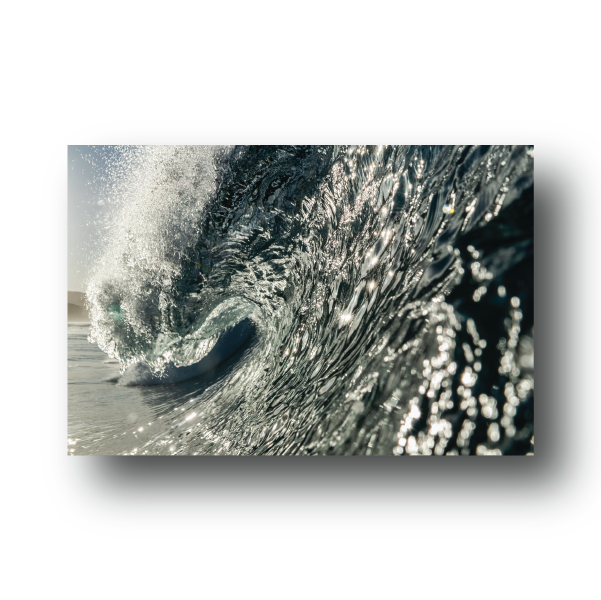
Creating "Moving Ice"
The Story
Background: In January of 2021 I was visiting family near Todos Santos in Baja Sur, MX, which is just about an hour north of the famous party city of Cabo San Lucas. For those who are not familiar with surf spots of Baja, one of the well known breaks is Cerritos Beach. This beach has two breaks, a point and a beach-break. Depending on your style, experience, and what you like, there is a wave for you! I am not just saying that, Cerritos beach is a wonderful spot to learn and on the flip its a great place to drop into stand-up barrels when swell is pumping.
Now, the day I photographed “Moving Ice” was an epic day in the water. The swell had been strong for multiple days and the peak was coming this morning. Waking up extra early, I loaded my camera into the housing and headed for the beach. Looking to the east, first light shone over the Sierra de la Laguna, the colors would soon pop, but the tide was high. Slipping into my wetsuit, I headed for a swim, starting at the break break, trying to get a photograph of a breaking wave.
With my camera in hand, flippers making me look like a duck, I swam. The waves were large, pushing me around. Worried that my water housing could slip out of my hand and wack me on the head, I held tight as I ducked under waves. The roar and spit of the waves forced a focus I have only experienced a few times before. Whenever I could get into position, I would snap frame after frame. Passing through waves and almost taking the smashing plummet over the falls, I constantly collected myself. These waves are powerful.
As the tide went out, the sun rose higher in the sky, and surfers populated the beach—adding a layer of danger— I continued to snap frames, becoming more and more bold. Finding myself sequestered in barrels, I had found my favorite spot to shoot the beach break. With my finger on the trigger, I snapped. The wave tossed, a barrel formed, and I popped out the other side of the wave. I had just snapped “Moving Ice” without fully knowing.
Thirty more minutes would pass, continually shooting more waves, dodging surfers, and playing in the ocean. Eventually I returned to the terrestrial world. Walking back to see the family, I scrolled through the images. Catching my first glimpse of “Moving Ice”, I was excited! Once back, I started to upload and put some soft touches to the image, then called the family over to check out the photograph.
Personal connection to Baja Sur: Between swimming in the ocean and surfing in waves, the spot which holds a spot in my heart is this break, Cerritos Beach in Baja Sur, Mexico. It is here where I learned how to stand on a foam surfboard in the backwash 20 years ago. The wave here is magical as you can be surfing on a longboard, riding 2-foot waves off of a point break one day, then, the next, you can be tucking into overhead barrels on a beach break. The water is warm and clear. The locals are friendly. If you decide to visit, tread lightly and be kind in the line-up.
To date, “Moving Ice” is one of my favorite because it looks as though the water, reflecting the light, is a gigantic piece of ice frozen in space. Maybe these are just my eyes thinking this, maybe not. But, I’ve to admit, this photo from early 2021 remains one of my favorites.
Photographing in the Ocean

An unridden, open barrel at California’s big wave surfing mecca Maverick’s in Half Moon Bay, CA.
Logistics of photographing in the water
Photographing in the water has its challenges. Luckily, this skill, and the gear, has been refined by many over the last 15 years. Before hoping in the water with a camera, here is a list answers to key questions you’ll need to understand:
How do I swim out into the break safely?
If this is a surf break, which is usually a good sign that there will be waves, watch how the surfers get out. For the most part you will follow their lead, just dive under the wave as it comes at you.
If this isn’t a surf break, be careful and pay close attention to the surroundings. If there is a wave breaking, this means there is something happening under the water to create a build up of energy, creating a wave. This could be a rock, a reef, a log, a sand bar, and so much more. To know this, go on a “small” day, or a day with little swell. If you can, bring goggles with you and dive under the water. Avoid the crashing of the wave until you know what is underneath you.
Where do waves break?
Waves break when there is a build up of energy, usually created by an uplift in the ocean floor. This could be an underwater canyon, a reef, or even a wind swell that makes the water move. Now, if you are new to photographing waves, your best bet in getting “the shot” will be a surf break or a beach break. Now, beach breaks can be dangerous and often have a rip current you’ll need to watch out for, so you don’t get sucked out to the ocean.
If you are photographing where surfers are, be sure not to get in their way! A fin, or board, to the face can/will be fatal. To seek out these waves, just go on Surfline or Magic Seaweed, both are good resources to find waves.
How do I protect my camera?
Since camera’s are not water proof, you’ll need to protect it. The good news is protecting your camera is simple these days, but the hard part is choosing the correct water housing for yourself. Almost water housings fit the bill now, however others are better. At first, I used an affordable water housing, to find out if I was interested in shooting in the water. As time went on, I invested in an AquaTech Housing, designed to take a beating from waves and allowed for me to use a wider selection of lenses that I own.
Am I fit enough?
While the topic of fitness can be a mixed bag, this is an important one to check in with yourself. As fitness level’s go, swimming endurance and breath hold time are the two metric some of the most important to maintain. Swimming in the ocean with a camera to photograph waves is similar to climbing mountains, once you get out there and shoot, you’re only half-way done. You still have to get back to shore. At first, this may not seem like a big deal, but image photographing Mavericks from the water, that is 1 mile of swimming just to get there and back, not considering the push/pull of the swell, having a camera, etc. So, please, make sure you’re honest with yourself and your abilities.

When photographing in the ocean, there are more than just waves, make sure to look around and let the beauty sink in! Photographed in Todos Santos, Baja Sur.

A golden sunrise barrel shot with a slow shutter-speed from Baja, Mexico.
Important safety checks
-What are the objective hazards before getting in?
Make sure to understand what and where the objective hazards are before you get in the water.
-Is your camera completely sealed?
You only need to make this mistake once. Double check your seals, they can break. Double check your latches, they can rust. Double check your lens port, they can wiggle loose.
-What is your exit strategy?
Once you are finished, you need to know how you are going to get out. If you jump off a cliff to get into the water, or catch a ride on a jet ski, how the heck are you going to get back to safety?
Conclusion
Photographing in the ocean can be dangerous, so please be careful. On the flip side, the images you can create inside and around the ocean are different, they can take your work to the next level, and you can find your own niche. Weight the risks and reap the rewards. Enjoy the process of learning to shoot in the water along with the experience of floating. Seek out warm water locations as well as cold water. Dive under the water, but also enjoy the surface, this world is your oyster.
If you have any success stories or images you want to share, send me an email, or drop a comment below.